If you are not familiar with the terminology UI Identifier, please check the following article: What is UI Identifier?
In this article, we are going to learn how to create UI Identifier manually
To learn the other options available, refer to Different methods to create UI Identifiers
Note 1: This guide is intended for Advanced Users. Familiarity with UI Identifiers, XPath and CSS Selectors is recommended for this guide.
If you are not familiar with XPaths or CSS Selectors, please use the Testsigma Chrome Extension to get the UI Identifiers easily. Please check the following article that describes the usage of Testsigma Chrome Extension - How to Create UI Identifiers for Web Application using Chrome extension?
Note 2: In case of test failure for UI Identifiers (due to dynamic page structure), please check the last section - Troubleshooting UI Identifier failure for tips on rectifying the failure.
Navigation: Test Development > UI Identifiers
The landing page looks as given below:

Please check the below article to know more about managing UI Identifiers:
How to manage(create/edit/delete) UI Identifiers?
Creating UI Identifiers
Clicking on the Create button on the top right corner opens the Create UI Identifier page with the input fields mentioned below.
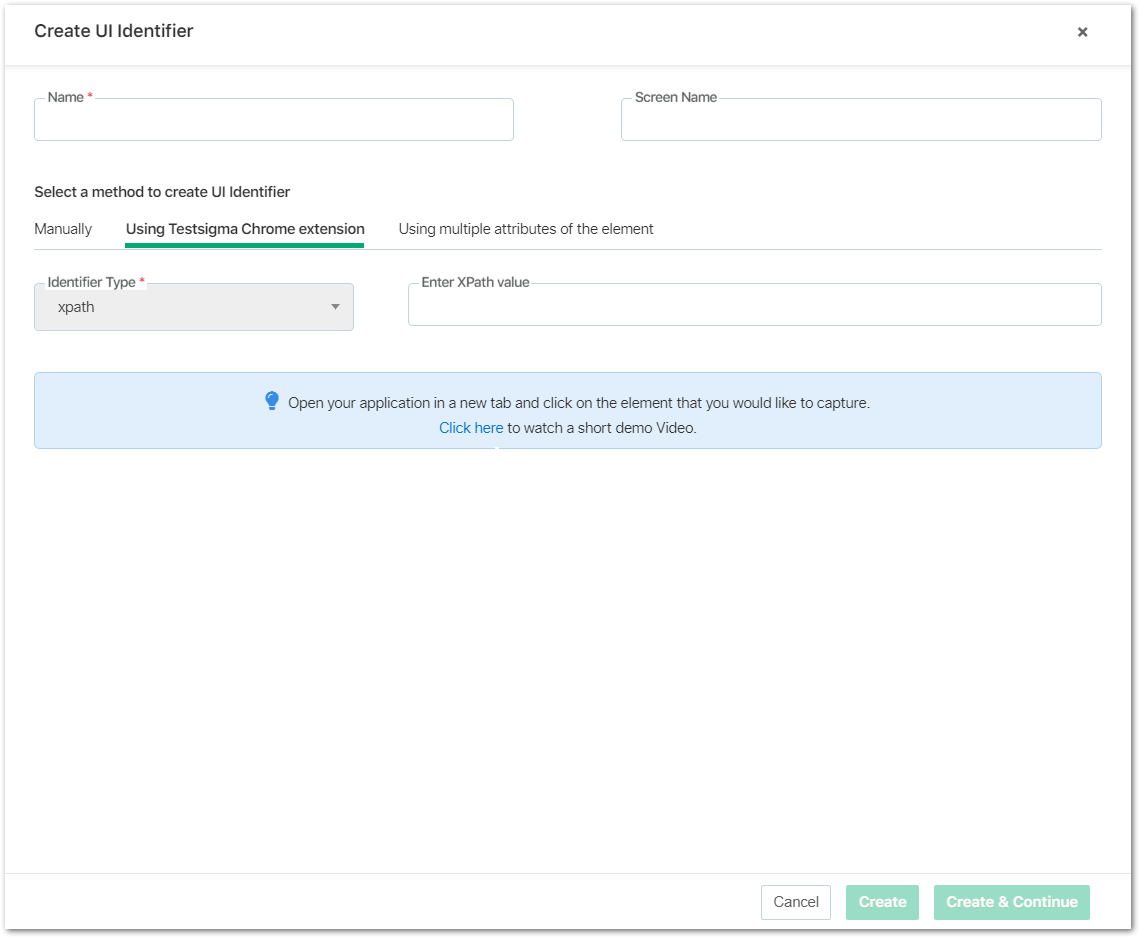
Enter the details as given below:
Name: Enter the name that is used for UI Identifier.
Screen Name: Screen Name will be helpful to group you identifiers by each screen in your application. This helps to you search identifiers in each screen in your application.
Identifier Type: Select the suitable locator from a drop-down box: ID, Name, XPath, CSS Selectors, link text, partial link text, class name, or tag name
UI Identifier value: Enter the value for the selected UI Identifier type. You can check multiple ways of formulating UI Identifiers in the section below - Different strategies for formulating UI Identifiers.
Once the UI Identifier value has been obtained and entered, click on Create button to finalize the creation. You can see the success notification for the newly created UI Identifier.
Different strategies for formulating UI Identifiers
UI Identifiers can be created from the attributes/properties of an HTML Element. Below given are 5 methods for formulating UI Identifiers
- Using Attributes of the element like id, name, placeholder
- Using multiple attributes of the element
- Link Text and partial link text of the element
- Using XPaths/ CSS Selectors
1. Using unique Element Attributes
You can use any of the element attributes such as ID, Name, Class name e.t.c if their value is unique. ID locator is the most preferred and recommended single attribute.
Please check the below article for learning how to use Chrome Developer Tools to get the attribute value:
How to get UI Identifier using Inspect Element option in Chrome Developer Tools?
2. Using multiple Element Attributes
You can use a combination of element attributes such as ID, Name, Class name e.t.c if any single one of them doesn't make the UI Identifier unique.
Please check the below article for learning how to use Chrome Developer Tools to get the locator value:
How to get UI Identifier using Inspect Element option in Chrome Developer Tools?
Once you get the Attribute values, you can use those attributes to generate unique XPath or CSS Selectors as explained in this guide:
How to create Xpath/CSS Selector with Advanced Options?
3. Using Link Text and Partial Link Text
You can use the visible text(fully or partially) on a link(anchor tag) for formulating UI Identifiers.
Please check the below article for learning how to use Chrome Developer Tools to get the link text:
How to get UI Identifier using Inspect Element option in Chrome Developer Tools?
4. Using XPath/CSS Selectors
You can generate XPath/ CSS Selectors for elements using Chrome Developer tools if you are familiar with XPath/CSS Selector creation
Happy Automation Testing!